+
Updated:
NirWP team
Whenever you want to post something in WordPress you should know some basic facts. here in this training post we are going to teach you how to start posting new articles in WordPress.
In this session, we are here to teach you Posting articles in WordPress in 15 minutes. The WordPress submission page may seem confusing to newbies; And many people only use the public parts of this section. In this session, we will review the items available on the add text page.
In the new WordPress update, the Gutenberg editor replaced the classic editor; And therefore, from now on, users must enter their content in the Gutenberg editor. You may not be familiar with this editor and you may have problems editing or placing your content, so we will describe Gutenberg’s step-by-step tutorial in this article.
In the first step, to write an article in WordPress or edit an article, you must act exactly like the classic editor. In this way, you have a section called posts in your user panel, which is divided into two separate sections under the title of adding posts and editing posts.
But before that, you should know how to enter your website dashboard, you can read our article about it: Login to WordPress dashboard
Here, in order to create a new post, you must select Add post; Or if you want to edit one of your previous posts, you must click on all posts and then click on edit your desired post.
In order to create a new post, you must select Add post, or if you want to edit one of your previous posts, you must click on all posts and then click on edit the desired post.
After you click on the option to add text, a page like the image below will open for you.
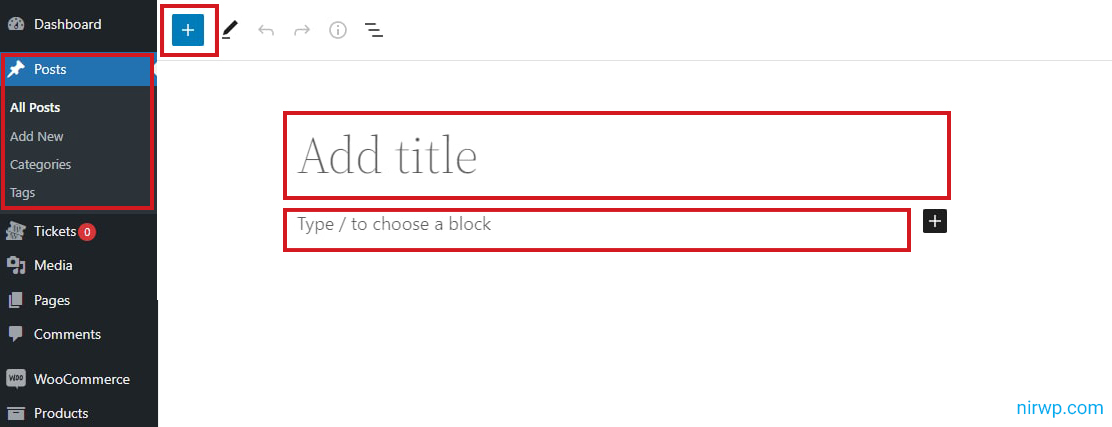
According to the image above, you must enter the main title of your post and text in the “Add title” section. However, note that any title you enter in this section will be considered as the main title.
The block under the add title option is actually the block where you can enter your desired text. In this section you can start writing.
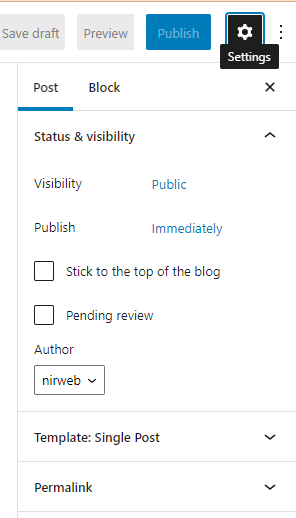
You will see the gear icon on the right and top of the Gutenberg screen; By clicking on it, Gutenberg settings options will be displayed for you and you can enter your desired settings from here.
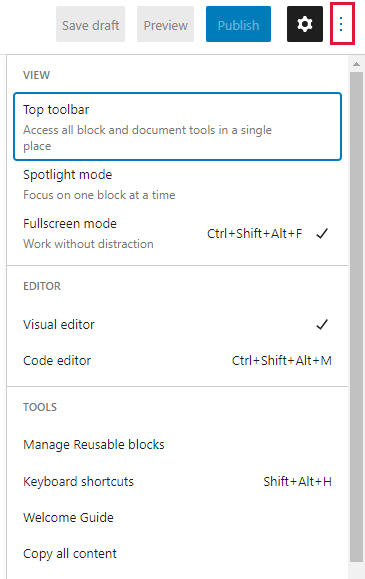
Just to the right of the gear icon, there is another option in the form of three dots, which is also about displaying tools; And you will have more options by clicking on it.
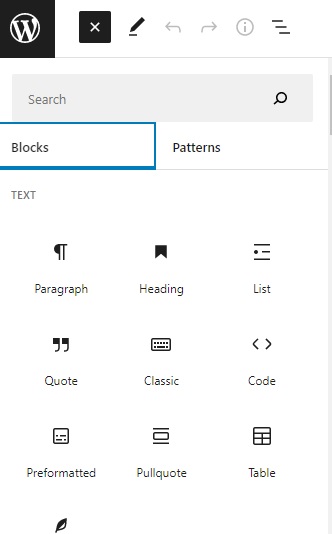
Another Gutenberg tool that is located on the leftt side and at the top of the screen and is displayed to you with the “+” icon is related to adding different blocks. In fact, after clicking on this option, you can add various blocks to your writing. From here you can access all the blocks. You can also use the section below to search for a block.
In this section, you will see various blocks, and by clicking on each of them, several icons will be displayed for you. From here you will have access to all Gutenberg tools.
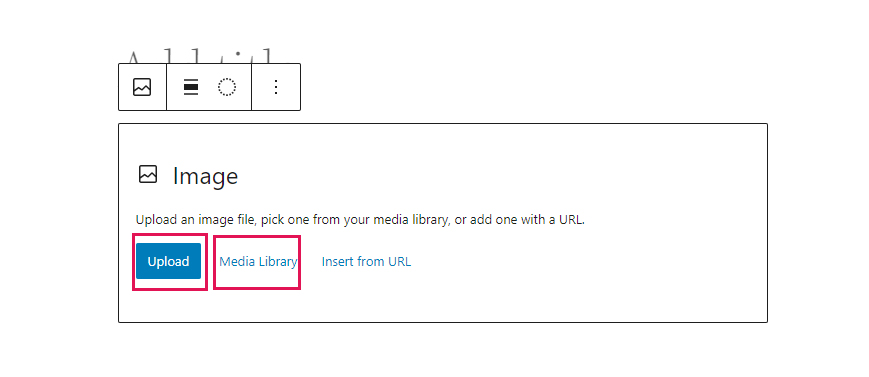
To add images in Gutenberg, you can use the add block option mentioned above and then select the “Image” option; to open a flat block for the title of the image. In the opened block, there is an option called upload where you can upload your images directly from your system.
In addition, there is another option called “Library of multimedia files” where all the images of your site are available, of course you can also upload your own images through this option.
All the writings and posts that you put on your site need a title and subtitle, having a subtitle will increase the readability of your text. In this section, you can use different titles according to your content.
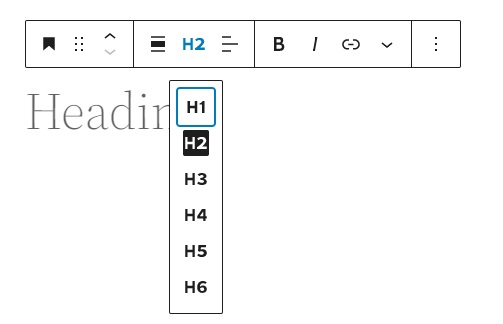
In this section, you can specify what your title should be. Normally, you should put your main title as H2 and choose other subtitles in order.
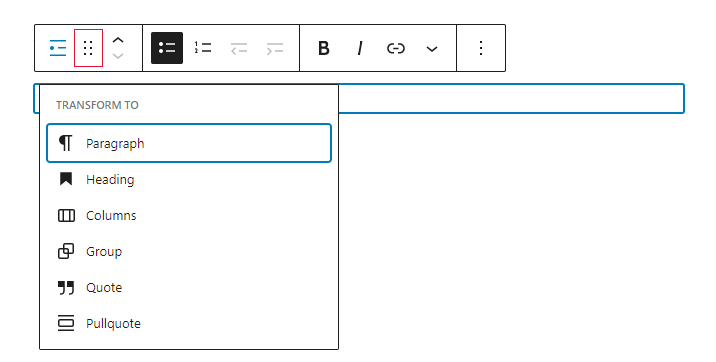
Another option that you can see in the toolbar section in the picture above is related to converting the title in such a way that by clicking on it, a new box will open for you; Using its options, you can convert your text into a paragraph, group or quote.
Normally, if you want to create a post in Gutenberg, you will see a counter and other options on the side of your screen that may distract you. In fact, you may want to write in Gutenberg without any distractions, for which you should activate the full screen mode in Gutenberg. To activate this mode, you must select the “full screen mode” option from the three dots icon on the left side.
In this way, posting articles in WordPress in 15 minutes will not be a hard and illogical thing.
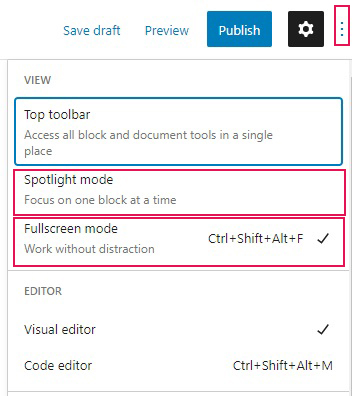
In addition to the above, you have the option of focusing on a particular paragraph by selecting the “spotlight” option. In fact, by choosing this option, other paragraphs will be dimmed for you and the paragraph you want will be displayed in bold.
In the Gutenberg editor, you have the possibility to change the color of the text of your text and even the background of the paragraph. To change these items, after clicking on the gear icon, go to the color settings section and choose your desired color.
In addition to the colors in this section, you can choose the color you want for the text and background by selecting the “custom color” option. Proper coloring is very important when writing content in WordPress.
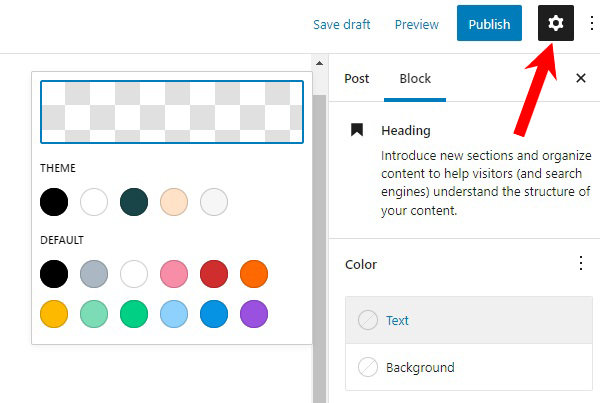
You may also want to choose another color after choosing one color; Or you have given up choosing a color altogether, in which case you should select the clear option to return your writing to the default.
To add a list to your content, you can click on the “+” option on the right; And from there, search and select the list option to open the list block for you. You can also select an article after you’ve written it and turn it into a list.
You can also convert your list into a paragraph by selecting the following option from the toolbar.
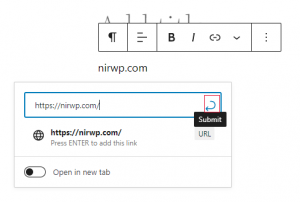
In order to be able to add a special link to a specific part of your writing, after selecting the desired text, you must easily select the “Ctr + K” keys from your keyboard; After selecting the mentioned keys, a new box will open for you in which you must enter your desired link; And click on the small arrow on the left and shown in the image below. After clicking on it, you will see that a link has been added to your text and your text has changed color to blue.
In order to save your writing and post, you must click on the “Save draft” option at the top of the page. You also have the possibility to see a live preview of your post by selecting the “preview” option. In addition, you can click on the “publish” option to publish your article and publish your post on the site.

In the categories section (bottom corner of the image), enter the category related to your article or if you don’t have one, you can create it.
Tags written in the post
The words you want your article to be displayed on Google by searching for these words. (used for site SEO)
Some WordPress themes support the featured image. Featured images are used to beautify the site and display a small image of the post in the site format. So, if your template supports the index image and you have written this section on the add page, you can choose your featured image. If you want the first image of the post to be placed as the featured image automatically, use the auto post thumbnail pro plugin.
After entering all the above items on the add post page, click the publish button to publish the content on your site.


No Comment