+
Updated:
NirWP team
Today, one of the best and most common site design methods is to use the WordPress content management system, which is much more economical than the design of an exclusive website, both in terms of cost and time required to implement the project. In this article we present how to install WordPress on Cpanel in 4 steps.
To design a site, you need to upload and install the related files on the host, which depending on the type of site host, which can be Cpanel, Direct Admin, Plesk or any other type of host management panel, the installation method is different. Here in nirwp we will teach you how to install WordPress on Cpanel in 4 steps.
The site host is actually a place where site information is stored and there are various tools for site host management, including the most important direct admin host management panels, Plesk and c-panel, which in this content we will teach you how to install WordPress on Cpanel.
We have categorized our training on 4 steps which are:
1- Downloading WordPress
2- Logging in to Cpanel and uploading WordPress
3- Creating database, DB username and password
4- Installing WordPress
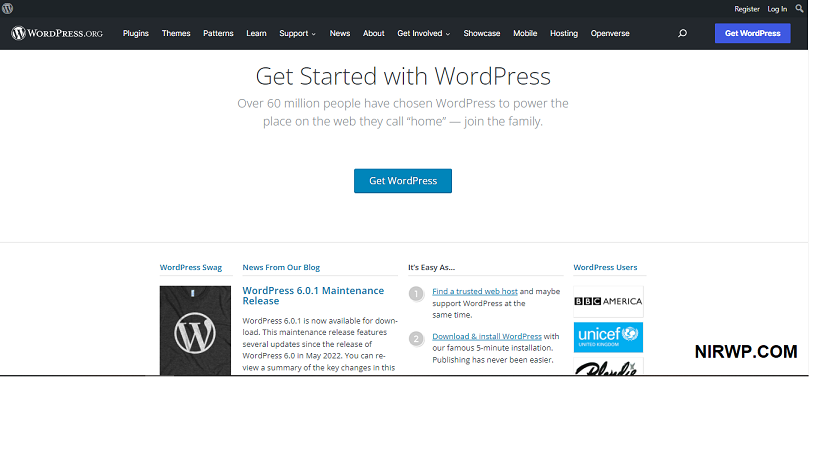
In the first step of the WordPress installation tutorial on Cpanel, you must first download the latest version of WordPress from the WordPress site at www.wordpress.org from the Get WordPress section as shown below, and save the file, which is a zip file, to your system.
In this step of the WordPress installation tutorial on Cpanel, you must upload the WordPress files to your site host.
At first, you must enter the account management section of your site host.
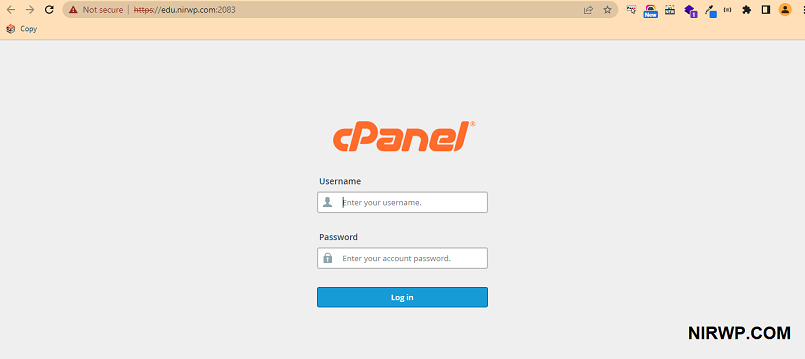
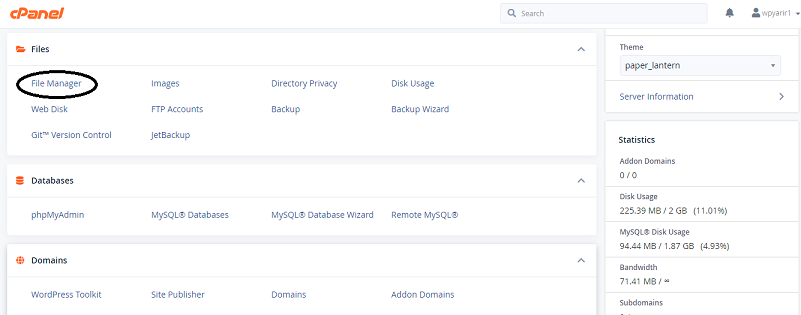
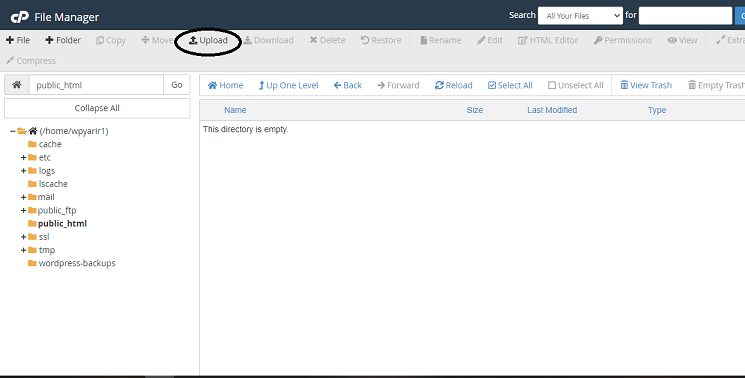
In the login page of your hosting management section, you must enter the user information of the site that is requested from you to enter the Cpanel management panel of your hosting. In this step, you must go to the “File Manager” section of your site’s Cpanel host management page.
Then, you must enter the public_html folder and upload your WordPress zip files in this folder, which is the main files folder of the site in Cpanel.
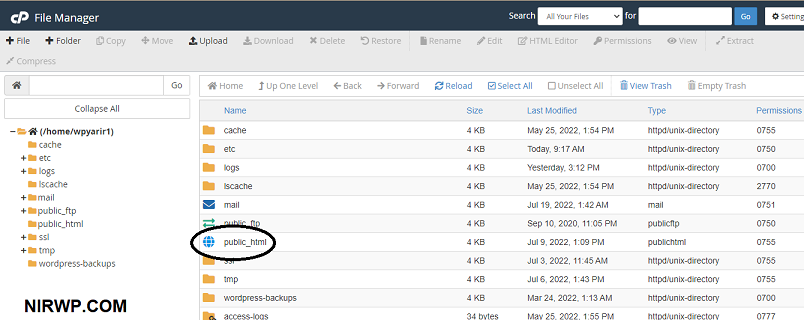
Do this via the upload option on this page as shown below. Create a file called WordPress in this folder and upload all your files in this folder. Sometimes it is hard or impossible to upload the files because of the internet speed; so, you can use Flash Fxp software to upload your files.
Of course, in this step, you can upload the WordPress zip file in the WordPress folder that you created in public_html. In this case, after uploading the WordPress zip file, you must unzip them in the same host by selecting the Extract option as shown below Then delete the zip file using the Delete option.
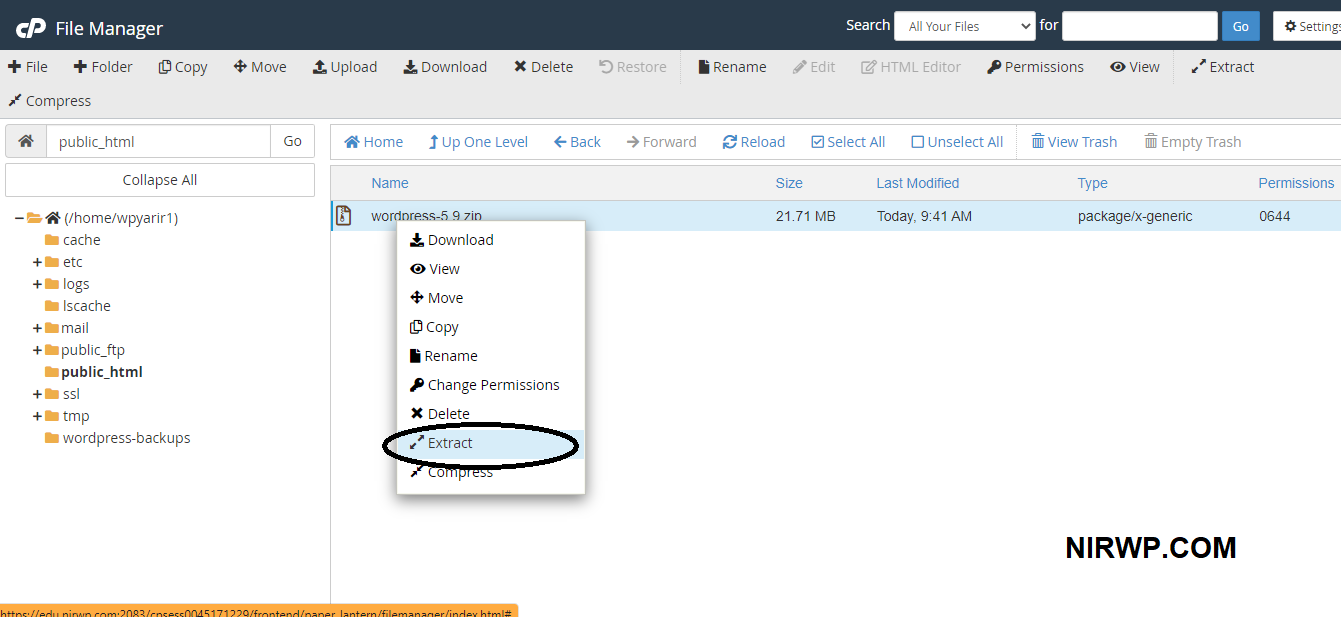
Move all the files of WordPress folder to the main directory of public_html and remove the WordPress empty folder.
After uploading WordPress files on Cpanel host, in the continuation of the WordPress installation tutorial on Cpanel, it is time to create a database on the host for the site, for which you must follow the following steps.
Go to the MySQL cPanel section in C Panel.
In the first step, you must click on the MySQL cPanel option from your Cpanel host management page as shown below.

Specify the database name
In the next step to create the database, you must specify a name for your database and then click the Next Step button.
Define the user for the database
In this step, you must define a user to access your site database. For this purpose, on a page according to the figure below, specify the username and password for your user and click the Next Step button at the bottom of the page.
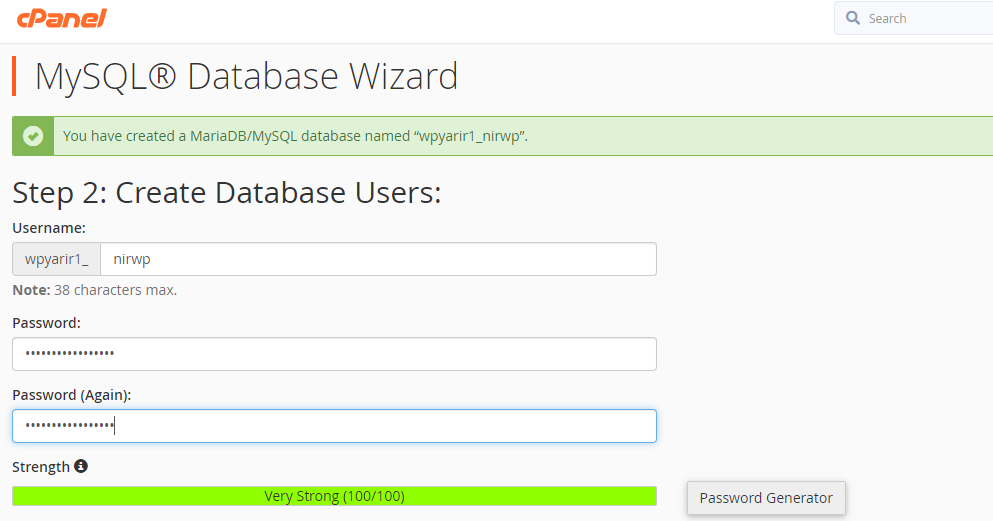
Of course, at this stage, be sure to use a password that is safe. For this purpose, you can use uppercase and lowercase letters and symbols simultaneously and in combination in your password. After specifying the username and password, be sure to use them in Save a specific location on your system so you can use them when needed.
Assign permissions to the user to access the site database
After you create a database for your site and then define a user by default, the defined user does not have access to your site database, which must create the necessary permissions for this purpose, which we will teach you in this section.
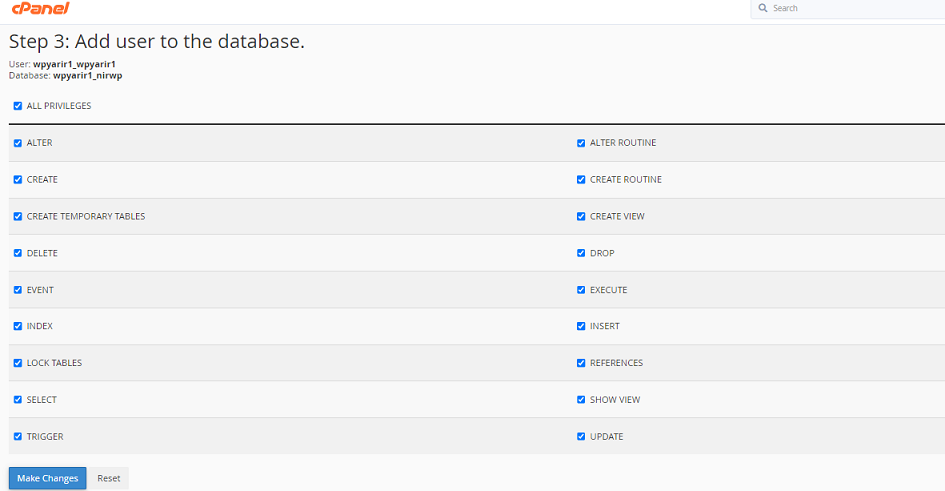
By following the steps mentioned above, you can create a database for your site and while defining a new user, create the necessary permissions for the user to access your site database. We will talk about WordPress installation settings on Cpanel host.
In the following tutorial to install WordPress on Cpanel, it is time to configure the settings for this WordPress installation.
Configure site settings by entering the site address in the browser
In the continuation of the WordPress installation tutorial on Cpanel, we will deal with the issue of configuring WordPress site settings by entering the site address in the browser. “How to Install WordPress on Cpanel in 4 Steps” is almost done in this step.
For this purpose, it is enough to follow the steps below step by step. Actually from this part on, this is similar to installing WordPress on XAMPP which you can read the article related to it in our website.
Enter the address of your site in the browser. For this purpose, for example, to enter the Nirwp site, you must enter the address nirwp.com/wp-admin/install.php and specify the language of your site in the opened page.
In the next step, you will be taken to a page as shown below, which does not require any special settings at this stage, just click on the “Let’s go” button to go to the next step.
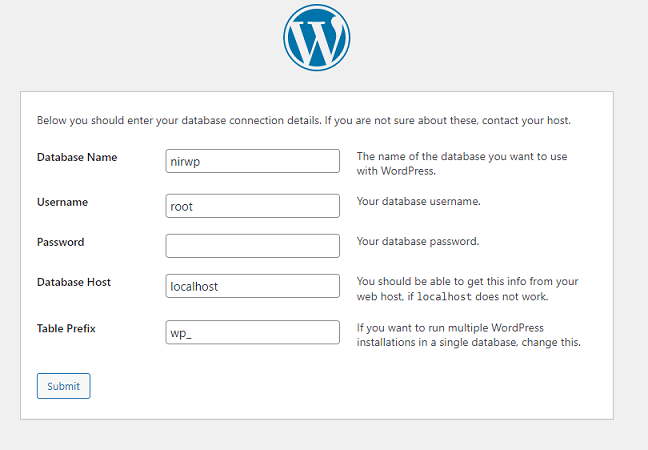
In the next step, you must enter the information about your site database in a page according to the image below, as you can see in this section, you must enter the information about the database name, username and password, and then click the submit button at the bottom of the page.
Finally, in the last step, enter the information about your site on a page according to the figure below and click on the WordPress Run button.
At this stage, you will be asked for information such as site title, username, site password and email that you must enter.
Keep in mind that for the security of your website, your password should be as strong as possible.
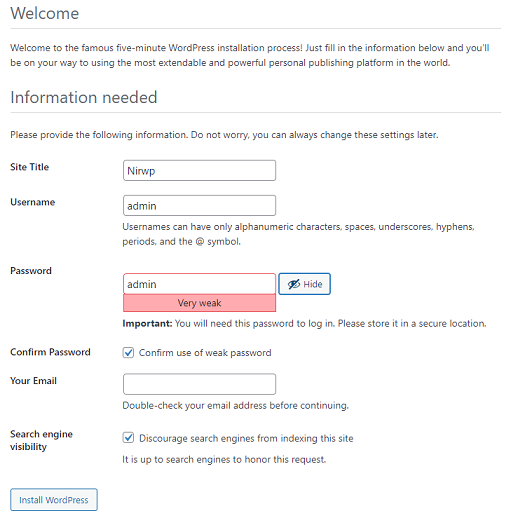
Keep in mind that if you do not have any logical reason for not allowing the search engines to index your content, Do not tick “search engine visibility” part.
By following the steps mentioned above, you can easily install WordPress on Cpanel host.
Conclusion
In this content, in the collection of WordPress training contents of Nirwp site, while introducing the C-Panel host management panel, we taught you how to install WordPress on Cpanel, and we taught you the different steps of this step by step.


No Comment