+
Updated:
Second lesson
NirWP team
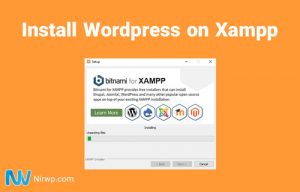
How to Install WordPress on XAMPP | In this article, we teach how to install WordPress on localhost using xampp
As we mentioned earlier, WordPress is a web-based content management system.
To know How to Install WordPress on XAMPP, you need programs that run PHP files and store information in a database. To run WordPress on a personal computer or localhost, you need to provide this context for WordPress. In addition, there are several programs to do this; One of the best of these programs is XAMPP.
Installing XAMPP is almost like installing a very simple program or game on Windows systems. Also be sure to note that if you are using a Mac system, use MAMP.
If you are not fully aware of WordPress, first watch “What is the WordPress” video.
Here are some tips on installing XAMPP, and in the following we will explain how to install WordPress on XAMPP localhost. First, in the first step, you can refer to this link, download and install the latest version of XAMPP according to your operating system. Of course, before installing XAMPP software, be sure to turn off the system antivirus and firewall.
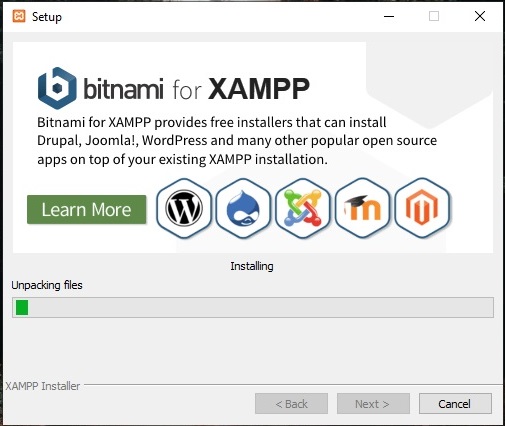
Well, to install WordPress on XAMPP, the first thing you need to do is download the XAMPP software from its reputable site: apachefriends.org and run it on your system. Installing this software is just like any other program, and all you have to do is Click on “Next” to complete the installation process.
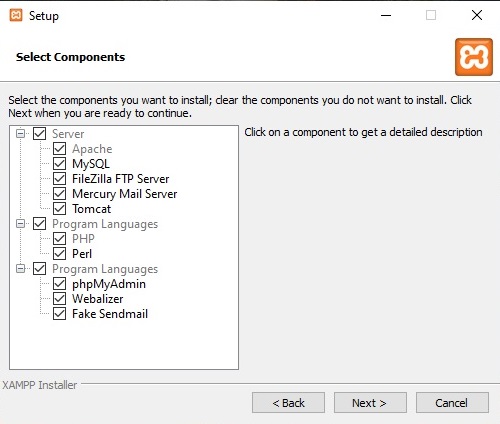
However, if you see a page like the one below during installation, just check the required boxes to install additional modules.
At the end and on the last page, click “Next” to start the installation.
After installation, click on the XAMPP icon named ” XAMPP Control” to load the following page.
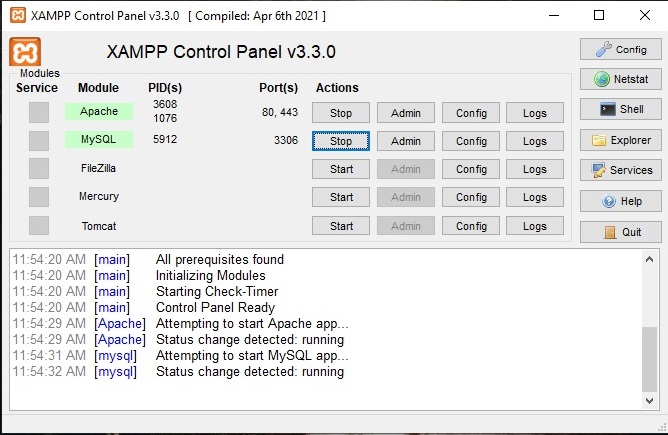
Keep in mind, when you first run this program; None of the list programs are in Running mode. Next to the name of these programs is the “Start” option; You can activate them by clicking on “Start” as shown below. Be sure to note that if these buttons do not work when you first install the program, you can fix this problem by restarting the system once.
Installing WordPress on XAMPP localhost is not a complicated task and you can do it easily and without any hassle. This is easier than installing on purchased hosts.
If you follow all the steps mentioned in this article, you will be able to easily install WordPress on localhost. so, let’s start!
The first step is to create a database to install WordPress; To do this, you must enter “localhost/phpmyadmin” in the browser’s address field; After pressing the “Enter” button, the following page will open. Then you have to click on “New” on the left side and as is shown in the following image:
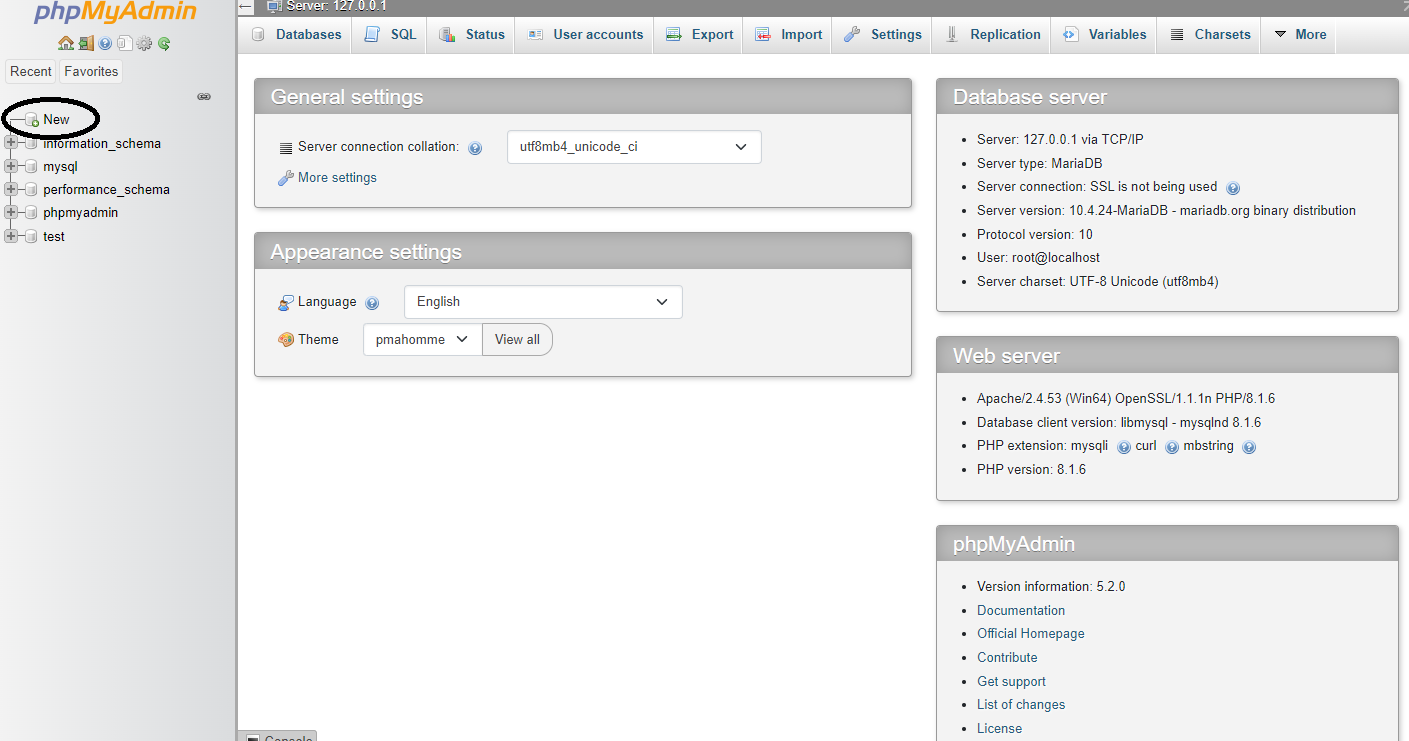
You can enter a name for your database in the first part of the page that is marked with number “1”, and in the next section you can also choose the format that supports your database. This does not matter, but we recommend that you click on the option shown in the image below. then click on “create”.

Once you have created your database, you can use it to install WordPress. Note that in applications such as XAMPP, the username is “root” by default and does not have a password. This is not a problem because it is on your personal computer and you can change it in the future.
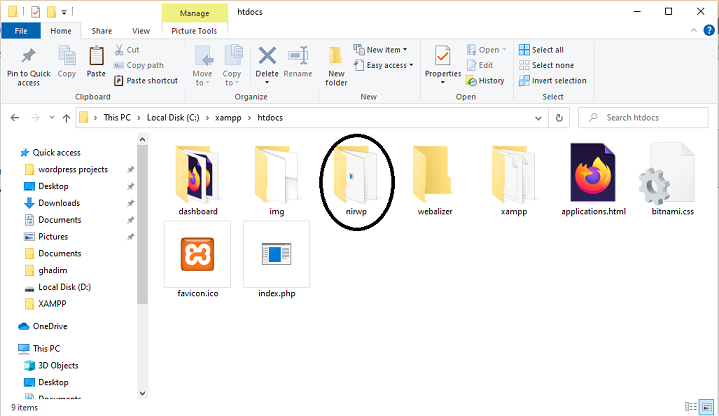
To do this, you must first download the latest version of WordPress and go to the XAMPP installation address which is C:\xampp. Next, unzip your WordPress folder in the htdocs folder, which acts as the root of your host, in a file with the name you want your site to go to at that address on your local host.
For example, if your file name is nirwp ; Your site address in localhost is localhost/nirwp as you can see on the image below:
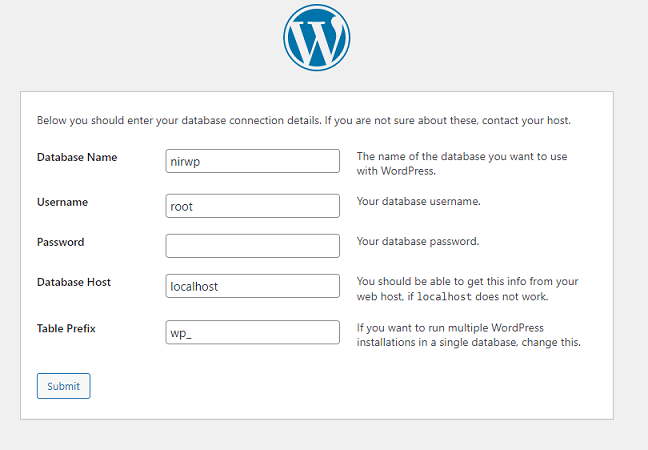
Next, go to the address of your website on localhost which is “localhost/nirwp” here. Then Choose you preferred language and click next. Then click “let’s go” and you will see a page like the image below in which you should write the name of the database that you have created on “Phpmyadmin” on the first box.
Write “root” in username box and keep the password box blank. Keep the next two boxes (database Host and Table prefix) as they are and then click on submit.
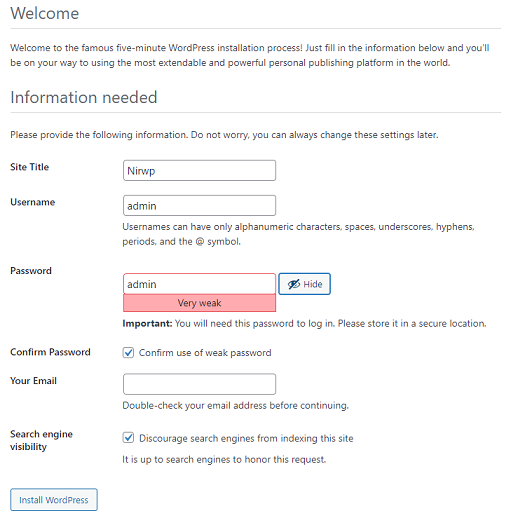
Then click run the installation. you will see a page like the following image in which you should write the title of your website and create a username and password for the site dashboard.
Changing the user name is a bit difficult and for this, we have to enter the database, so it is better to be careful in choosing it and not to use simple words like Admin, because the probability of hacking is high. keep in mind that, this point is mostly for hosting and is not very important in local hosting.
keep in mind that your password should be always a strong one when you are installing WordPress on web, but for the time being, we are installing it on our localhost and it is not very important to have a strong password. so, confirm the weak password, write your email and install the WordPress.
Now you can log in to your website and access your dashboard.
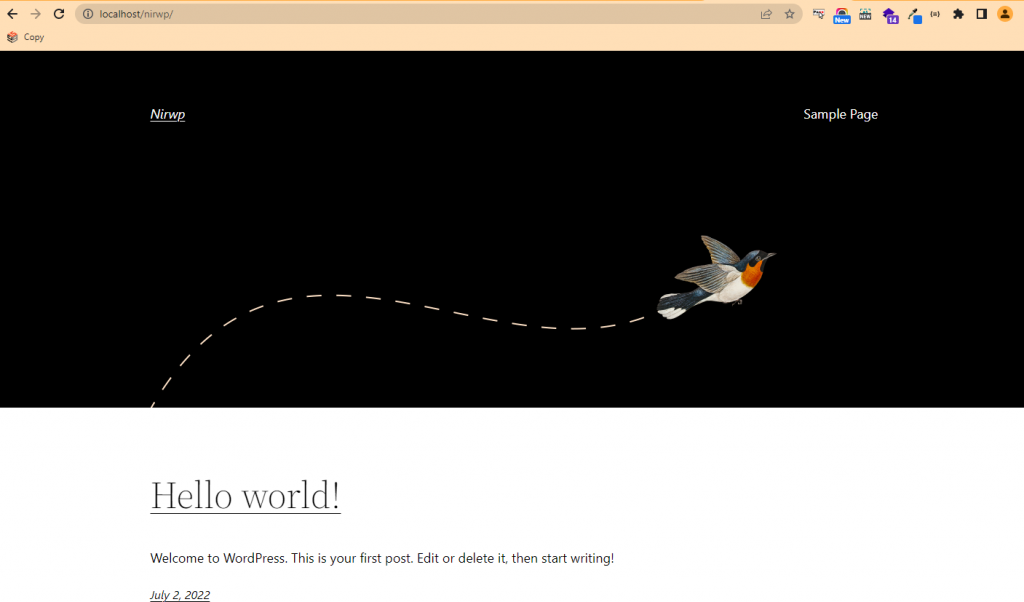
As we said in the example above, your site URL is localhost/nirwp, which after opening it, the following page will be displayed for you.
As easy as a pie!
We hope that with the help of this article you have been able to install WordPress on your localhost, or rather, install WordPress on xampp. Good luck.


2
Thanks amillion. It was very useful. Especially the video was totally cleare.
Hi Max. thanks a lot for your kind comment. We are happy that out content is useful for you. You can follow our other tutorials about WordPress to learn more.