+
Updated:
NirWP team
While creating a website, the first step is to choose a domain name, and then choose your hosting service. If you do not connect them together, your website won’t work. because of this you should make sure that connecting domain to hosting account is done successfully.
First of all, if you’re at a beginner level, you should choose a domain name for your business and register it. This will be your address on the Internet.
In summary, here we present some simple steps for you to know the way of connecting domain to hosting account. They are as follows:
Now, let’s have a look at those steps in detail…
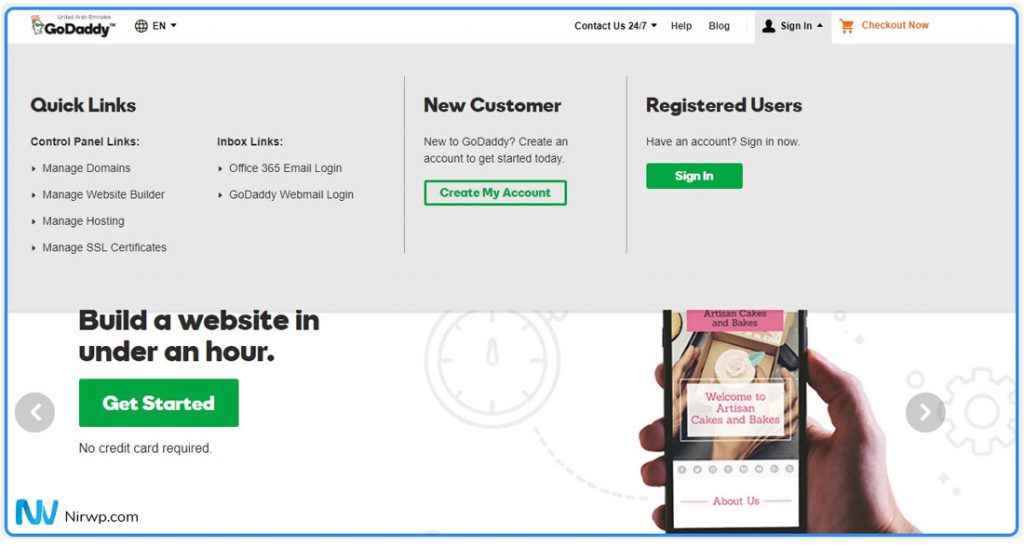
First, go to ae.godaddy.com and login to your GoDaddy account by clicking the Sign In button on the top-right, under “Registered Users.”
When you login, you’ll see a page with your GoDaddy products listed in it. If you end up on a different page, you can click the arrow next to your name and then My Products to view your products page. Under Domains, you’ll see a list of domain names you’ve purchased from GoDaddy. Select the domain name you’d like to connect to your hosting account and click Manage.

As you can see above, this will take you to the page where you can manage that specific domain name. On this page, you can also view information related to your domain name i.e. when it will be automatically renewed. Having mentioned auto renewals, we should make a reminder:
If you don’t renew your domain before the expiration date, someone else might take them.
If you would like to get more information on registering a domain name, read our article titled:
Session 02: How to Register a Domain Name

When you scroll down on the Domain Settings page, you will see the Manage DNS option.

When you click Manage DNS, you’ll be directed to the DNS Management page. On this page, scroll down until you see Nameservers.

Now, this is where the actual process of connecting your domain name to your hosting account starts. Click the Change button next to where it says, “Using default nameservers.”

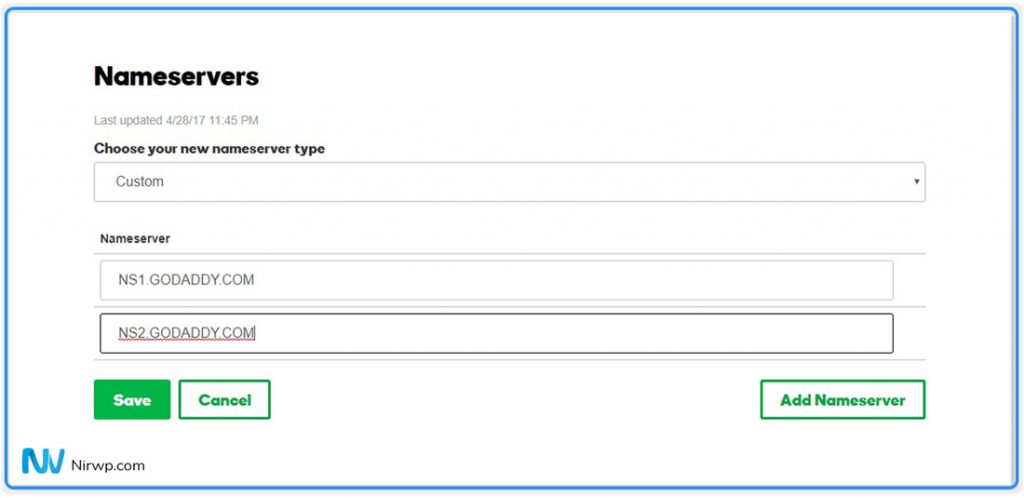
To be able to point your domain to your hosting account, you need to choose the Custom option; not Default.

After selecting the Custom option, you’ll see two lines below that say “Enter your nameserver.” In order to complete the process of connecting your domain name to your hosting account, fill in the nameserver addresses; one will start with NS1 and the other with NS2.

When you purchase your hosting plan, your hosting provider emails you the nameserver addresses that begin with NS1 and NS2. If you don’t know what you should type in here, check your junk folders or get in touch with your hosting provider. After entering these address into the appropriate boxed, click Save and you’re done.
Don’t panic when right after you hit Save you enter your address and see your website doesn’t load. Please don’t forget that it might take 24 to 48 hours for the information to be deployed on DNS servers.


1
I have been browsing online more than three hours today, yet I never found any interesting article like yours. It?s pretty worth enough for me. In my opinion, if all web owners and bloggers made good content as you did, the net will be a lot more useful than ever before.